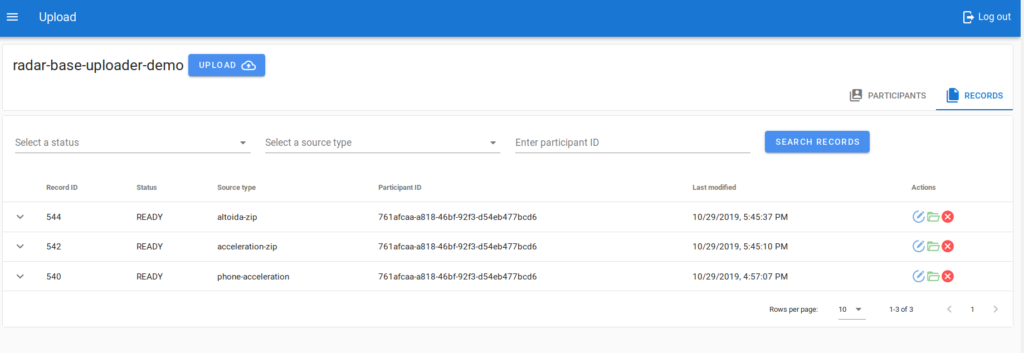
This is a step-by-step guide to the newly developed web based application to manually upload data to RADAR-base. This documentation is focused on the end-users.
If you are interested in setting this up on your RADAR-base deployment or interested in knowing more, please visit the github repository.
Prerequisites #
- A modern working browser.
- Stable internet connection.
- An account from Management Portal to login to the system.
Step-by-step guidelines. #
1. Go to the upload application interface of your deployment at `https://domain-name/upload`. Please ask your system administrator to provide you the correct URL of the application.
2. Click on Login with Management Portal.

3. You will be redirected to a login screen. Please enter your credentials from Management Portal to login.
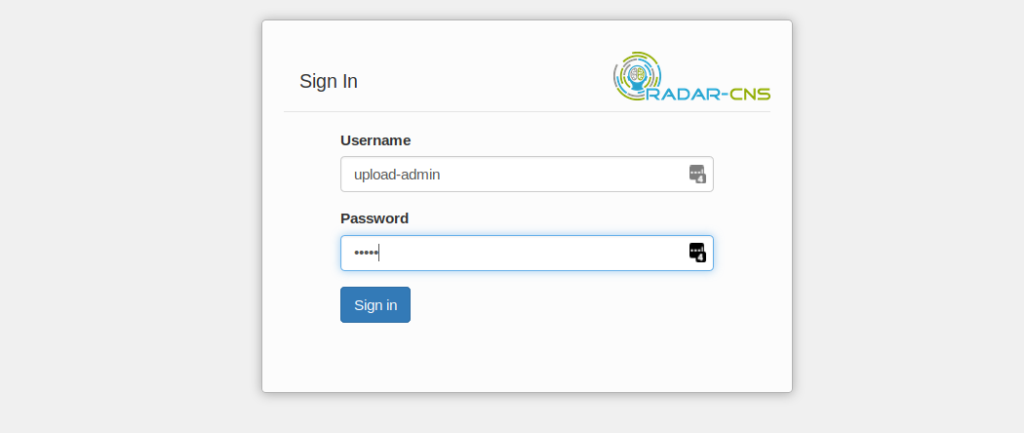
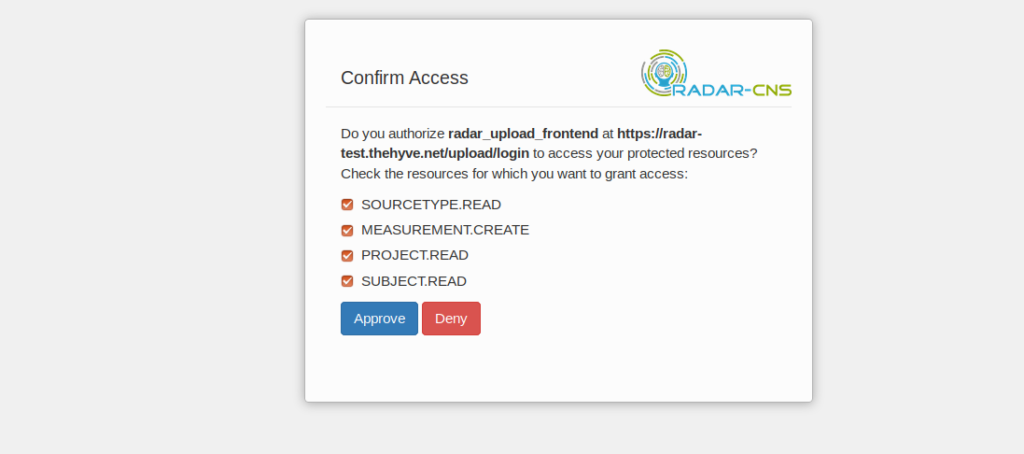
4. Once you have successfully logged in, Please click on the Approve button to allow the web-interface to upload data.
5. Now, you will see the home screen of the application. It will list all of the projects you have access to. Please select the project you want to work with.

6. In the project view, under the PARTICIPANTS tab, you will see all of the participants enrolled.

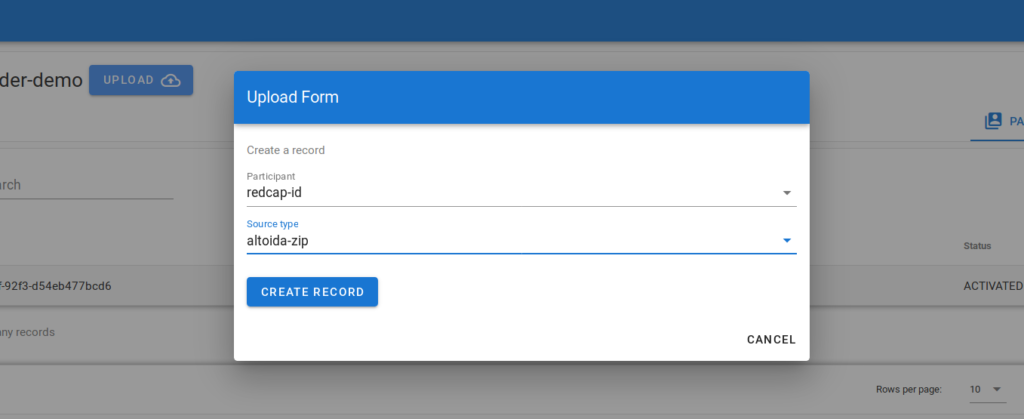
7. Click on the UPLOAD button to upload data.
- Select the participant you want to upload data from. The participant’s external id will be listed in the drop-down.
- Select the type of device or data source of the data from the drop-down list.
- Click on CREATE RECORD
8. Once you have created the record, you will see the identifier and the status of the record. In this example, it is 542 and INCOMPLETE, respectively.
Now you can start adding data to upload by drag and drop or selecting a file from your computer.
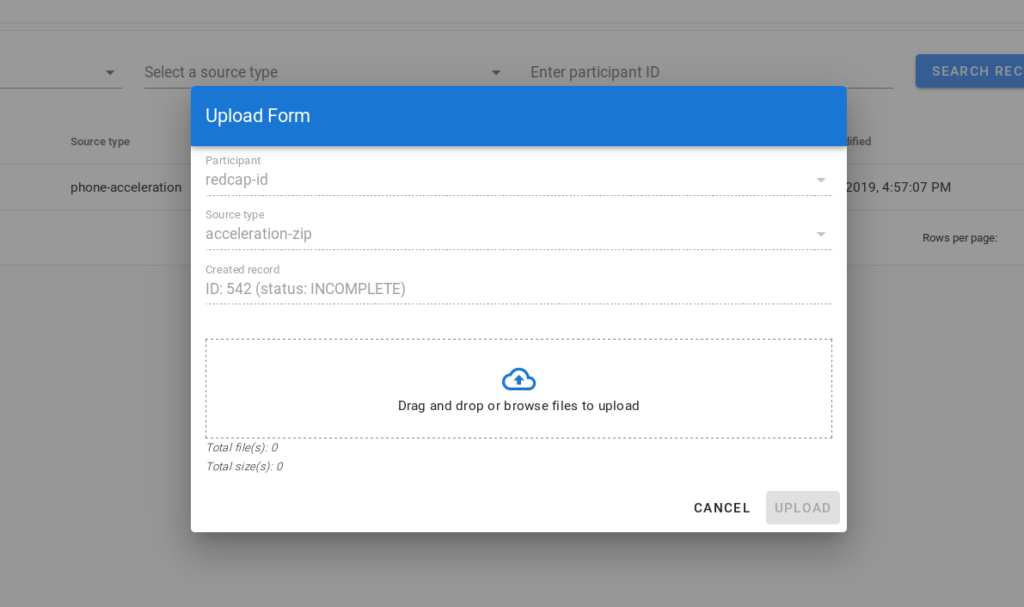
9. Now, you can start adding data to upload by drag and drop or selecting a file from your computer. Then click on the UPLOAD button.
- You can select one or more files to upload. This example demonstrates only one file in the record.
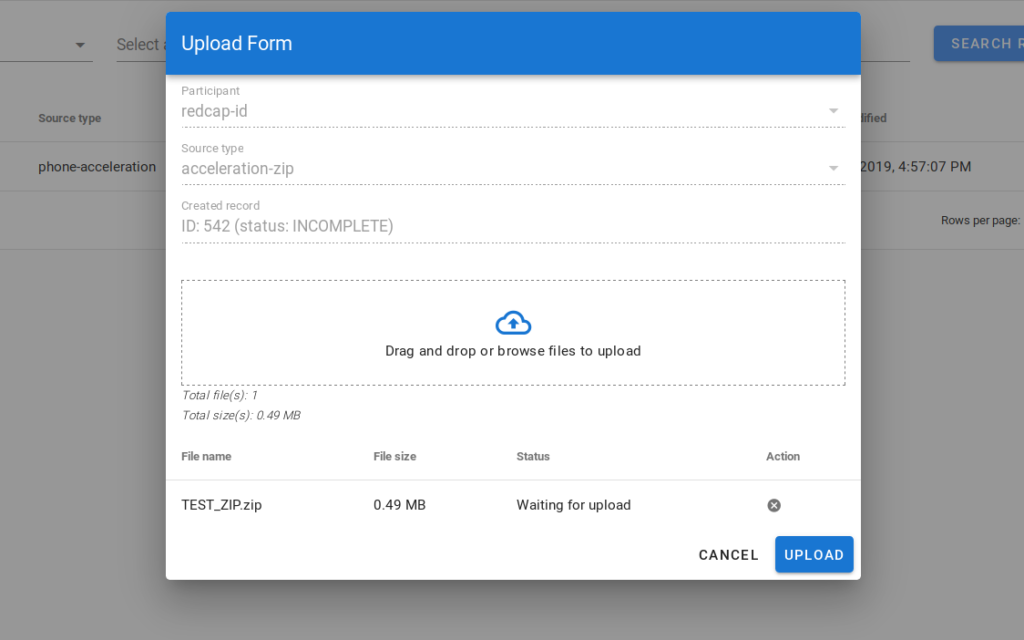
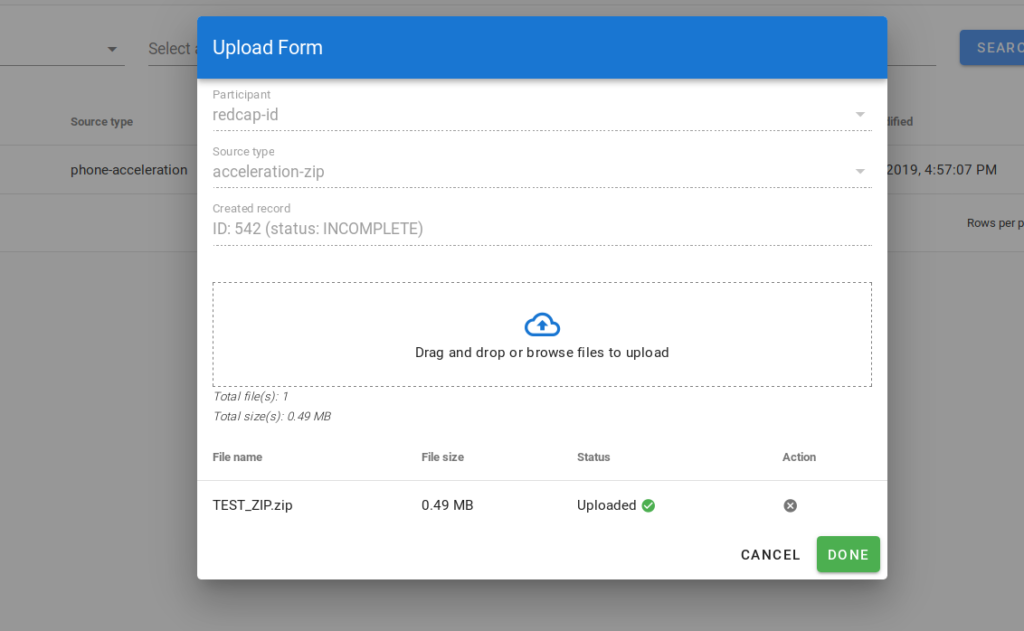
10. Once you are done with uploading files for this record, please click on the DONE button. This will finalize the record creation process and mark it READY for post-processing by the RADAR-base platform.
11. Under the RECORDS tab, you can see a list of all records available under your project.
11.1. Here, you can monitor the status of the records. A description of the record status is mentioned below.
- INCOMPLETE: You have created a record entry, but it is not ready for processing. Until you upload files and click on the DONE button, the record will be INCOMPLETE.
- READY: The record has all of the files uploaded and ready for processing.
- QUEUED: The record has been queued for automatic processing.
- PROCESSING: The record is being processed.
- FAILED: The automatic record processing has been failed. Possible causes could be the data is corrupted, the data was not marked with the correct device-type/source-type, or something else went wrong while processing.
- SUCCEEDED: The record processing was successful.
11.2. You can edit the record if available.
You can make changes to existing records if necessary, except when it is in the PROCESSING state.
e.g. You can edit the record that FAILED, if there was e.g. a human error in record creation.
11.3. Filter records based on available categories.
11.4. Delete a record, if necessary.
